Why Can I See Daylight Around My Exterior Door?
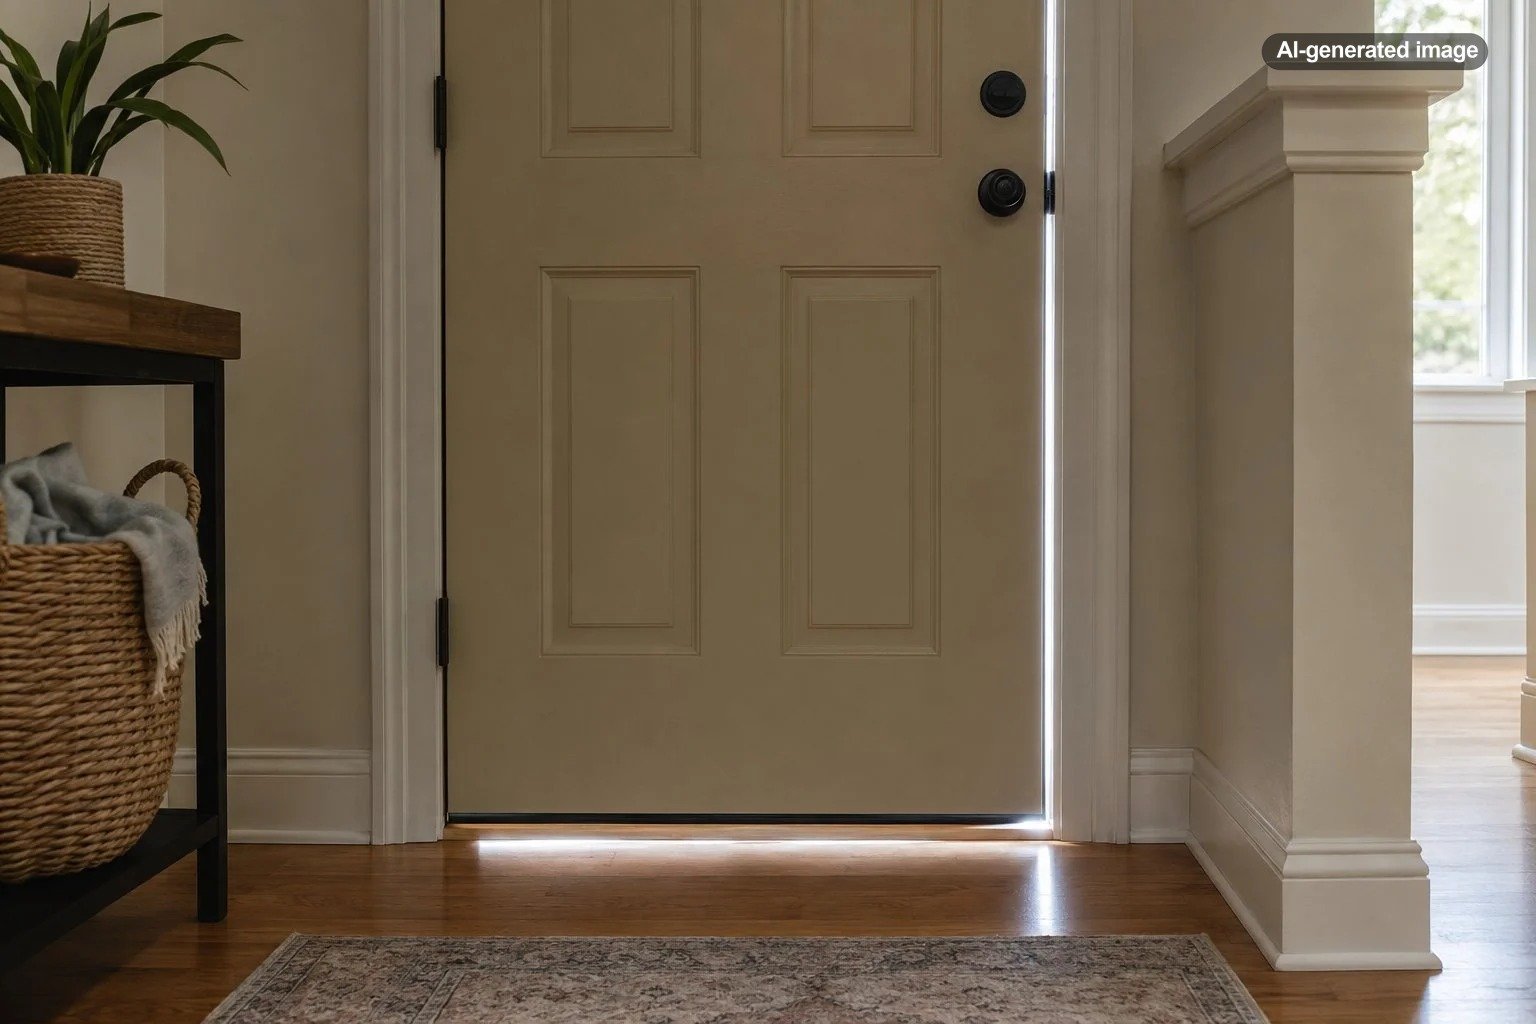
Daylight around a closed exterior door means there is an open path between the interior and outdoors. The cause is often worn weatherstripping, a poorly adjusted threshold, a missing door sweep, or a door that no longer sits squarely in its frame. The light itself is not the problem; it is a useful clue that the weather seal is incomplete.
Small gaps can admit drafts, outdoor humidity, dust, insects, noise, and wind-driven rain. Fortunately, many cases can be corrected without replacing the entire door. The right repair depends on where the light appears and whether the door is aligned, stable, and easy to operate.
What the location of the daylight can tell you
The pattern matters more than the mere presence of light. A continuous, narrow line usually suggests a missing or compressed seal. A wedge-shaped opening points more strongly toward alignment trouble.
| Where light appears | Likely explanation | First item to inspect |
|---|---|---|
| Along the top | Compressed weatherstripping or uneven door position | Top seal and hinge tightness |
| Along the latch side | Worn seal or insufficient contact with the stop | Weatherstripping and strike alignment |
| Along the hinge side | Loose hinges, damaged seal, or frame movement | Hinge screws and jamb condition |
| Under the door | Worn sweep or an improperly set threshold | Sweep, threshold, and floor clearance |
| At one corner | Sagging, warping, or an out-of-square opening | Door alignment and diagonal gap pattern |
Perform the inspection from indoors during daylight, but do not rely on sight alone. Move a hand slowly around the closed door on a cool or windy day and listen for outdoor noise. A thin piece of paper placed between the door and seal can also reveal weak contact: if it slides out without resistance in one location but not elsewhere, the compression is uneven.
Start with the hinges and latch
A door that has shifted should be adjusted before it is weatherstripped. Open the door partway and gently check for movement by lifting at the handle. Visible play can indicate loose hinge screws or worn components. Tighten only accessible screws that are loose, using a properly fitting hand tool and avoiding overtightening that could strip the wood.
Close the door slowly and observe the spacing between the slab and frame. The gap should look reasonably consistent. If the upper latch-side corner sits lower than it once did, the door may be sagging. If the latch does not engage easily, the strike plate may be misaligned, but moving it without first identifying why the door shifted can conceal the underlying problem.
Inspect the weatherstripping
Weatherstripping seals the top and vertical sides of the opening by compressing when the door closes. Depending on the door system, it may be a kerf-mounted strip pressed into a narrow groove, an adhesive-backed foam strip, or a fastened metal or vinyl carrier with a flexible gasket.
Look for torn sections, flattened areas, hardened material, paint buildup, missing corners, and pieces that have pulled away from the jamb. Pay particular attention to the upper corners, where separately cut strips must meet without leaving a notch of exposed daylight.
When replacement is needed, match the mounting style and select a profile that fills the gap without making the door difficult to latch. Measure each side rather than assuming that all three pieces are identical. Follow the product instructions for surface preparation, fastening, corner joints, and allowable temperature during installation.
Check the sweep and threshold
Light below the door usually involves the sweep, the threshold, or both. The sweep is attached to or integrated into the bottom of the door. The threshold is the sill beneath it; some thresholds have an adjustable cap that can be raised or lowered in small increments.
A proper bottom seal should contact the threshold across the width of the opening while still allowing the door to swing and latch normally. Raising an adjustable threshold too far can create drag, accelerate wear, and make the entrance harder to use. A sweep that brushes an interior rug or catches on an uneven floor is similarly likely to fail early.
Use caulk only in the right place
Caulk seals stationary joints; weatherstripping seals moving ones. Caulk may be appropriate where exterior trim meets siding or where an intact frame has a small stationary joint, provided the sealant is compatible with the materials and the joint is meant to be sealed. It should not be smeared between the door slab and jamb, across drainage openings, or over an adjustable component.
Daylight that appears between the jamb and surrounding wall trim is different from light between the door and its stop. The former may indicate a missing or disturbed seal around the installed door unit. Removing trim or correcting concealed flashing and water-management details is a more involved project and may justify professional evaluation.
What to do
- Photograph the closed door and mark every location where light is visible.
- Check that the door opens, closes, and latches without lifting or force.
- Inspect hinge fasteners, the strike area, and the consistency of the perimeter gap.
- Examine weatherstripping, corner joints, the sweep, and the threshold for damage or weak contact.
- Correct alignment first, then replace or adjust only the sealing components responsible for the remaining gaps.
- Close and operate the door several times to confirm that the repair seals the opening without impeding normal use.
When the problem is more than weatherstripping
A new gap can occasionally reflect a warped door, deteriorated jamb, loose frame, water damage, corrosion, or movement in the surrounding opening. Those conditions deserve more attention than a strip of foam. A qualified door installer, carpenter, or appropriate building professional can determine whether the slab, frame, or surrounding assembly needs correction.
How to prevent the gap from returning
Inspect exterior door seals at the beginning of heating and cooling seasons and after severe weather. Clean the threshold so grit does not abrade the sweep, and avoid painting over flexible seals. Address a dragging or difficult door promptly; repeated force can loosen hardware and damage the frame.
Also look beyond the visible line of light. If the entry is exposed to frequent rain, confirm that gutters, overhangs, drainage surfaces, and exterior joints are directing water away from the opening. A weather seal is intended to limit air and incidental moisture, not correct a larger drainage problem.
The best repair leaves the door pleasantly uneventful: it closes smoothly, latches without a wrestling match, and shows no daylight around its perimeter. Diagnose the geometry first and the gasket second, and the fix is far more likely to last.
Frequently asked questions
Is any daylight around an exterior door normal?
A visible opening through the closed assembly indicates that the seal is incomplete. Decorative gaps around interior trim may cast shadows, but a direct view outdoors through the perimeter of the closed door should be investigated.
Can I add weatherstripping over the old seal?
Layering seals can make the door difficult to close and may produce uneven pressure. Remove damaged or inappropriate material and install a compatible replacement according to its instructions.
Does a daylight gap mean I need a new door?
Not necessarily. Worn weatherstripping, loose hinges, a tired sweep, or a poorly adjusted threshold can often be corrected. Replacement becomes more plausible when the door or frame is warped, deteriorated, unstable, or unsuitable for the opening.
Why does the gap reappear after I replace the weatherstripping?
The door may still be sagging, the replacement profile may be too small, or the frame may be moving. Recheck alignment and identify whether the seal is losing contact in one area rather than repeatedly adding material.