
How to Keep White Cabinets Clean in a Busy Kitchen
White cabinets do not necessarily get dirtier than darker cabinets, but they reveal fingerprints, grease, crumbs, drips, and cooking residue much sooner. The most effective way to keep them clean is not an occasional marathon scrub. It is a gentle routine that removes fresh marks before they harden into a sticky film.
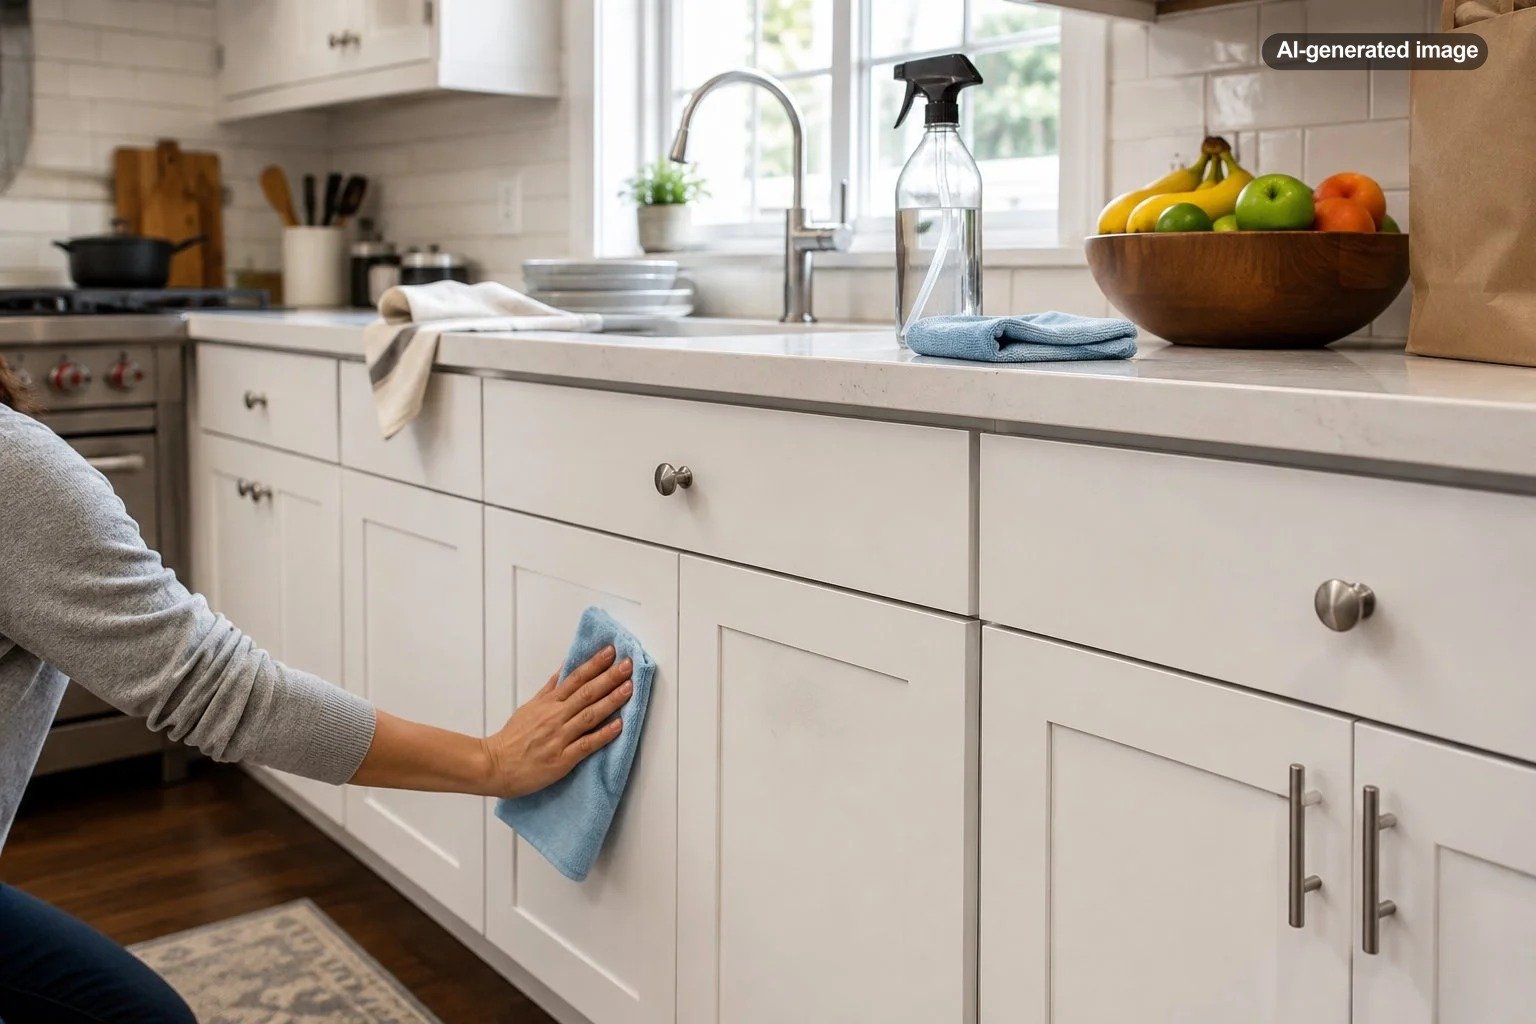
For most finished cabinets, begin with a soft microfiber cloth, warm water, and a small amount of mild dish soap. Wipe with a barely damp cloth, rinse away any soap residue with a second damp cloth, and dry the surface promptly. Always check the cabinet manufacturer’s care instructions before using a new cleaner, especially on painted, glazed, high-gloss, wood, or custom finishes.
Understand What Is Making the Cabinets Look Dirty
Different kinds of grime need slightly different treatment. A gray mark around a handle is usually a mixture of skin oils and dust. A tacky area near the range is more likely airborne cooking grease. Small amber dots may be dried sauce, coffee, or oil splatter. A generally dull appearance can come from cleaner residue rather than dirt.
Location provides useful clues. Inspect the doors beside the cooktop, the cabinet above the coffee station, the trash pullout, the cabinet beneath the sink, and the drawers used for utensils. These areas usually need attention sooner than upper cabinets that are rarely touched.
Before cleaning the whole kitchen, test your method on one inconspicuous section. A cabinet finish may look durable while still being vulnerable to aggressive degreasers, rough scrubbing pads, excessive water, or repeated exposure to acidic and alkaline mixtures.
Build a Small Cleaning Kit
A practical cabinet kit can be simpler than the crowded collection beneath many sinks. Keep several clean microfiber cloths, a bowl or spray bottle for diluted mild dish soap, cotton swabs or a soft detailing brush, and a dry towel together. Having the right supplies within reach makes a two-minute wipe more likely to happen.
- Microfiber cloths: Use one for washing, one for rinsing, and one for drying.
- Mild dish soap: A few drops in warm water are usually enough for routine grease and fingerprints.
- Soft detailing tool: Use it carefully around molding, corners, and hardware bases.
- Manufacturer-approved cleaner: Reserve it for finishes that require specific care.
Avoid steel wool, rough scrubbers, melamine foam unless the cabinet maker specifically approves it, and brushes with stiff bristles. These may change the sheen or leave fine scratches that are especially noticeable on white doors.
Use a Top-to-Bottom Cleaning Sequence
Start by dusting or dry-wiping the cabinet fronts. Removing loose particles first prevents them from becoming muddy streaks. Work from upper cabinets downward so drips do not land on areas you have already finished.
What to do
- Remove loose dust and crumbs with a clean, dry microfiber cloth.
- Mix a few drops of mild dish soap into warm water.
- Dampen a soft cloth and wring it out thoroughly.
- Wipe one small section at a time, paying extra attention to handles and lower door edges.
- Use a second lightly dampened cloth to remove soap residue.
- Dry the surface immediately with a clean towel.
Do not spray cleaner directly onto a cabinet door unless the manufacturer specifically instructs you to do so. Direct spraying can leave concentrated cleaner on the finish and allow liquid to collect around panel joints, hinges, seams, or exposed edges. Applying the solution to the cloth gives you better control.
Remove Grease Without Scrubbing Away the Finish
Grease becomes harder to remove when it is allowed to combine with dust and repeatedly warm near the stove. For light residue, hold a warm, damp, soapy cloth against the mark briefly, then wipe gently. This gives the cleaning solution time to loosen the film without aggressive rubbing.
For heavier buildup, repeat the process in several short passes. More force is not necessarily more effective. Vigorous scrubbing can burnish a matte finish, flatten a textured finish, or create a shiny patch on satin paint.
Be cautious with undiluted vinegar, bleach, ammonia, solvents, concentrated degreasers, waxes, furniture polish, and homemade mixtures combining several cleaning agents. A product that cuts grease effectively on an appliance may be too harsh for a painted or coated cabinet finish.
Handle Common Marks Individually
Fingerprints around pulls
Clean the pull first, then wipe the surrounding door area. Otherwise, oils left on the hardware can immediately transfer back to the cabinet. Dry metal hardware and the cabinet surface separately so moisture does not remain around screw holes or decorative backplates.
Food splatters
Soften dried food with a warm, damp cloth rather than scraping it with a fingernail or utensil. Wipe from the outer edge toward the center to avoid spreading colored sauces across a larger area.
Scuff marks
Begin with the mildest method: a soft cloth and diluted dish soap. Scuffs sometimes sit on top of the finish, but marks that do not respond to gentle cleaning may be scratches or worn paint. Continued rubbing can make the damage more visible.
Residue in corners
Use a damp cotton swab or a very soft brush around routed details and molding. Do not flood grooves with water. Follow immediately with a dry cloth or swab.
Protect High-Touch and High-Splatter Zones
A busy kitchen rarely becomes dirty at an even rate. Concentrate maintenance where hands, steam, food, and cooking oils regularly meet the cabinetry. The most useful routine is based on how the room is used, not an inflexible calendar.
| Area | Typical problem | Useful habit |
|---|---|---|
| Near the cooktop | Airborne grease and sauce splatter | Wipe after frying or other high-splatter cooking |
| Handles and pulls | Finger oils and grime | Clean several times a week |
| Trash pullout | Food residue and drips | Inspect when changing the bag |
| Sink cabinet | Water marks and cleaner residue | Dry splashes promptly |
| Lower doors | Shoe scuffs, pet contact, and spills | Spot-clean during floor care |
Ventilation also matters. Use the range hood when cooking generates smoke, steam, or grease, and maintain its filters according to the manufacturer’s directions. A working ventilation routine helps reduce the amount of airborne residue that eventually lands on cabinet fronts.
Create a Routine That Fits a Busy Household
A realistic schedule is easier to maintain than an ambitious one. After cooking, scan the cabinet fronts while wiping the counters. Removing one fresh tomato-sauce dot takes seconds; discovering a collection of hardened splatters months later is a different afternoon entirely.
- Daily: Wipe visible spills, wet marks, and fresh splatters.
- Several times a week: Clean the most-used handles and pulls.
- Weekly or every two weeks: Wipe high-use cabinet fronts, especially near the range, sink, trash, and food-prep area.
- Every few months: Clean less-touched doors, top edges, trim, toe kicks, and cabinet interiors as needed.
The secret to bright white cabinets is not stronger cleaner; it is shorter intervals between gentle cleanings.
Assigning the task to an existing routine can help. Clean lower cabinet fronts when mopping, wipe the trash pullout when replacing the bag, and clean the coffee-station cabinet while descaling or reorganizing the area. Small pairings make cabinet care feel less like a separate project.
Avoid Habits That Make White Cabinets Look Worse
Too much soap can leave a dull film that attracts more dust. Using the same greasy cloth on several doors merely redistributes residue. Allowing wet towels to hang against a cabinet can expose the finish and edges to prolonged moisture. Closing doors with food-covered hands creates marks precisely where they are most visible.
Another common mistake is treating every white cabinet as if it has the same finish. Factory-applied coatings, painted wood, thermofoil, laminate, acrylic, and refinished cabinets may have different care requirements. When in doubt, follow the cabinet maker’s guidance and test first.
Frequently Asked Questions
How do I prevent white cabinets from turning yellow?
Clean cooking residue promptly, use ventilation while cooking, avoid smoke exposure, and follow the finish manufacturer’s care guidance. Some color change can also come from aging paint, heat, sunlight, or coating chemistry rather than removable dirt.
Can I use vinegar on white kitchen cabinets?
Do not assume vinegar is safe for every finish. Its acidity and the strength of a homemade mixture can affect certain coatings. Use the manufacturer’s approved method or test a very small hidden area before applying any unfamiliar solution.
How often should cabinet interiors be cleaned?
Spot-clean spills immediately and clean shelves when crumbs, grease, or sticky residue appear. A more thorough interior cleaning every few months may suit a heavily used kitchen, while low-use cabinets may need it less often.
Why do my cabinets look streaky after cleaning?
Common causes include too much cleaner, a dirty cloth, hard-water residue, or failure to dry the surface. Wipe again with a clean cloth lightly dampened with water, then dry with a fresh microfiber towel.
When should white cabinets be repainted instead of cleaned?
Cleaning will not repair chipped paint, worn corners, deep scratches, swelling, peeling surfaces, or permanent discoloration within the finish. When gentle cleaning no longer improves the appearance, refinishing or professional repair may be the more appropriate next step.