
Why Does Bathroom Caulk Keep Turning Black?
Bathroom caulk usually keeps turning black because moisture allows mold or mildew to develop on the sealant, along its edges, or sometimes beneath it. Soap residue, body oils, poor ventilation, and aging caulk can make the problem more persistent. If the black marks return shortly after cleaning, the issue may be more than a dirty surface: trapped moisture, a failing seal, or a small leak could be involved.
The frustrating part is that a bathroom can look spotless everywhere else while the narrow line between the tub and tile remains stubbornly dark. Fortunately, the appearance and location of the discoloration can provide useful clues about what needs attention.
The goal is not simply to make the caulk white again. It is to figure out whether cleaning, better drying habits, or replacing the sealant will actually solve the problem.
What Makes Bathroom Caulk Turn Black?
Bathroom caulk creates a flexible seal where surfaces meet, particularly around bathtubs, shower enclosures, backsplashes, and sinks. These joints are exposed to repeated wetting, cleaning products, temperature changes, and movement.
Several conditions can contribute to black discoloration, and more than one may be present.
1. Mold growing on damp caulk
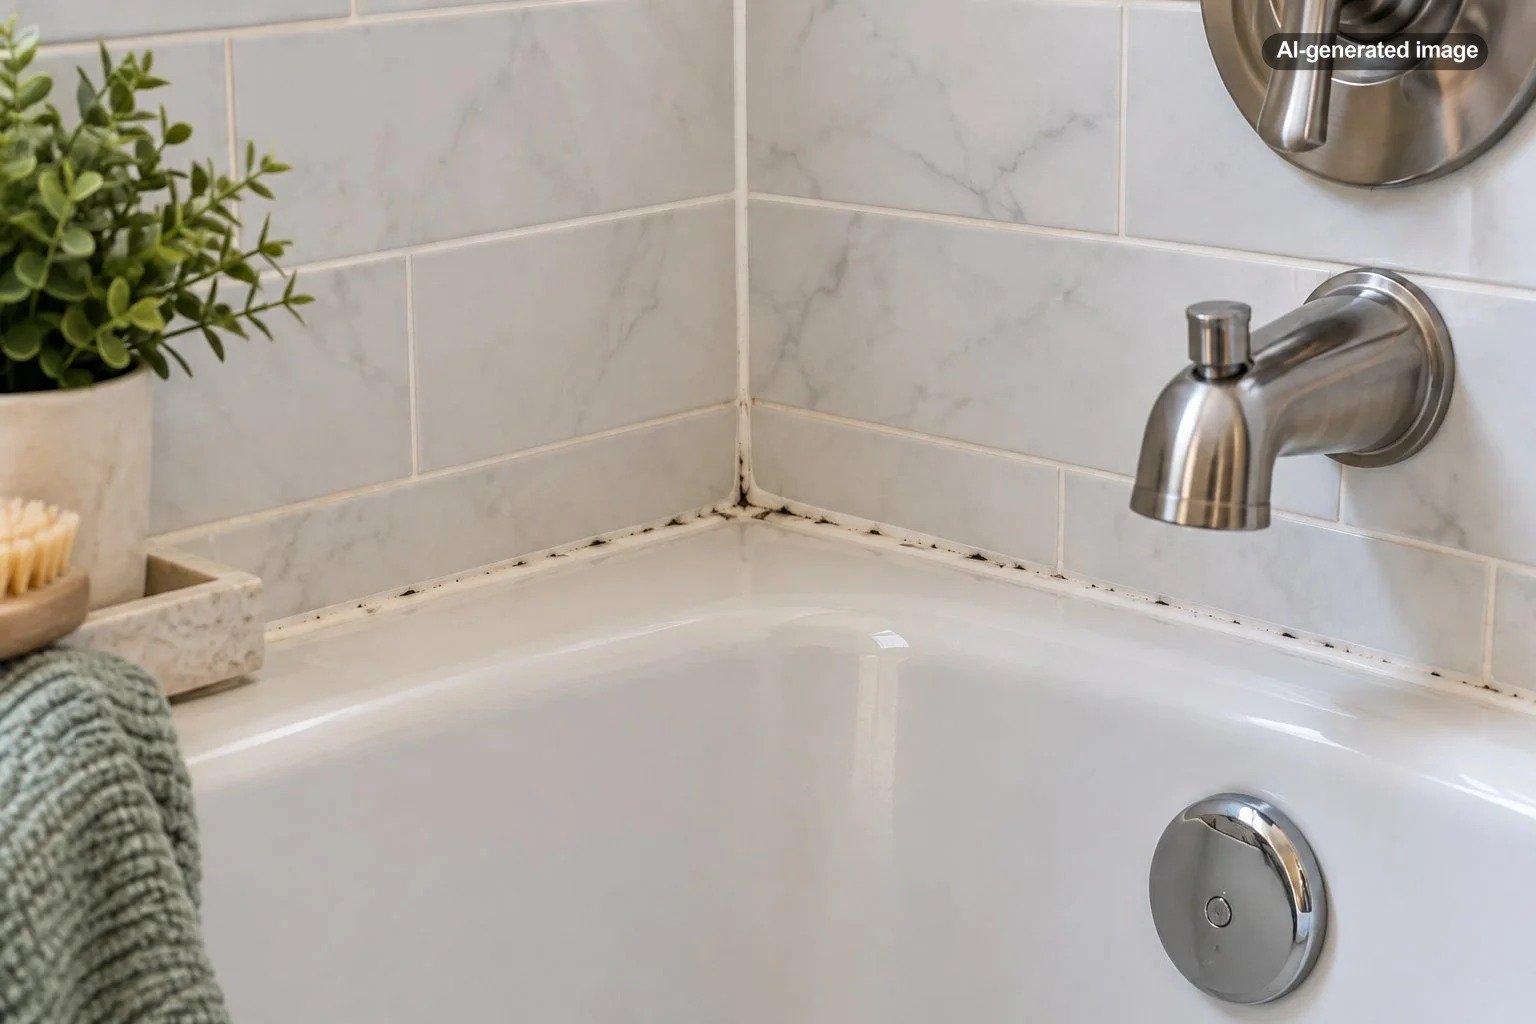
Mold is a common explanation for scattered black or dark gray spots along shower caulk. Bathrooms regularly provide moisture, and residue on the caulk can provide material that supports microbial growth.
Even silicone caulk marketed as mold-resistant is not immune to staining or growth on accumulated surface residue. Mold-resistant formulations can discourage growth, but they do not eliminate the need to keep the joint clean and reasonably dry.
The color alone does not identify the type of mold. Black discoloration should be treated as a reason to inspect and clean the area, not as proof of a particular mold species.
2. Moisture getting underneath the sealant
Caulk works only when it remains properly bonded to the surfaces it is intended to seal. A narrow separation between the bead and the tub, tile, or countertop can allow water to enter.
Once moisture gets behind a damaged seal, the area may remain damp longer than the exposed surface. Dark discoloration can then appear beneath an otherwise smooth-looking strip of caulk.
This is one reason scrubbing sometimes produces little improvement. The visible stain may be behind the material rather than on its surface.
3. Soap scum and body-care residue
Soap, shampoo, conditioner, skin oils, and mineral deposits can gradually form a film around shower joints. That buildup can hold moisture against the caulk and make routine cleaning less effective.
Residue can also collect along uneven application lines, particularly when an old bead has ridges, gaps, or rough edges.
4. Poor bathroom ventilation
A bathroom that stays humid long after someone showers gives moisture more time to linger on walls, fixtures, and sealant.
Signs of inadequate moisture removal can include persistent condensation on mirrors, damp window frames, and a shower enclosure that remains wet for much of the day.
The U.S. Environmental Protection Agency identifies moisture control and ventilation as important ways to reduce recurring bathroom mold.
5. Aging or damaged caulk
Over time, a caulk bead can lose adhesion, become brittle, crack, or separate from one of the adjoining surfaces. Repeated movement at a tub or shower joint can contribute to this deterioration.
Older material may also become permanently stained even after surface contamination is removed.
How to Tell Whether the Black Marks Are on the Caulk or Underneath It
Before selecting a cleaner or buying replacement caulk, inspect the affected joint under good lighting.
| What you see | Possible explanation | Sensible next step |
|---|---|---|
| Small dark spots on a smooth, firmly attached bead | Surface contamination or mold growth | Try gentle cleaning and complete drying |
| Dark marks that remain beneath a clean surface | Embedded staining or contamination behind the seal | Inspect adhesion and consider replacement |
| A dark line where caulk meets tile or a tub | Accumulated residue or a separating edge | Check carefully for gaps and lifting |
| Blackening with cracking, peeling, or loose caulk | Failed seal with possible moisture intrusion | Correct the moisture problem and replace damaged caulk |
| Discoloration that returns rapidly after replacement | Persistent moisture, inadequate drying, or another unresolved issue | Investigate ventilation and hidden water sources |
These patterns provide clues rather than a definite diagnosis. Dirt, staining, and microbial growth can look similar without closer investigation.
How to Clean Black Spots From Bathroom Caulk
When the sealant is intact and the affected area is small, gentle cleaning is a reasonable first step. The EPA recommends cleaning mold from hard surfaces with detergent and water, followed by thorough drying.
What to do
- Check the condition of the joint. Look for splitting, missing sections, loose edges, or soft surrounding materials. If the seal has failed, cleaning alone will not repair it.
- Ventilate the bathroom. Run an exhaust fan that vents outdoors, or provide appropriate ventilation before using cleaning products.
- Use a mild cleaning solution. Follow the cleaner manufacturer’s directions and choose a product compatible with the caulk and nearby surfaces. Mild detergent and water are a reasonable starting point.
- Clean gently. Use a soft cloth or nonabrasive sponge. Avoid aggressive scraping that could lift the caulk or damage nearby finishes.
- Rinse and dry thoroughly. Remove cleaning residue and wipe moisture from the joint. Allow the area to dry before evaluating the result.
- Reinspect the discoloration. If the surface is clean but dark marks remain within or beneath the bead, replacing the affected sealant may be more effective than repeated cleaning.
Wear appropriate protective equipment when cleaning suspected mold, and avoid disturbing large contaminated areas. People with respiratory conditions, immune suppression, or other relevant health concerns should seek appropriate professional guidance before handling mold cleanup.
Should you use bleach on black caulk?
Bleach is frequently suggested for dark shower stains, but it should not be the automatic first choice. The EPA does not recommend chlorine bleach as a routine mold-cleanup method. Killing mold does not necessarily remove the remaining material or correct the moisture conditions that allowed it to grow.
Bleach can also be incompatible with certain finishes and materials. If a particular product is appropriate for the surface, follow its labeled instructions exactly.
Never mix bleach with ammonia, acids, vinegar, or other household cleaning products. Dangerous gases can result from certain combinations.
A cleaner may lighten a stain without restoring the physical condition of the caulk. If the bead is loose or compromised, cleaning is not a substitute for resealing.
When Should You Replace Black Bathroom Caulk?
Replacement becomes the more practical option when the material can no longer provide a reliable seal or when discoloration cannot be removed from an otherwise properly cleaned surface.
Consider replacing the affected caulk when:
- Black staining appears embedded within the material rather than sitting on top.
- The bead has pulled away from the tub, shower base, tile, or countertop.
- There are visible cracks, gaps, or missing sections.
- The material has become brittle, loose, or noticeably deteriorated.
- Cleaning no longer improves the appearance, even though the surface is otherwise sound.
Replacement is not always necessary for a minor cosmetic stain on a firmly attached, functioning seal. However, a failed joint should not be left simply because its surface can still be cleaned.
How to Replace Shower Caulk Without Repeating the Problem
For an accessible, straightforward joint with sound surrounding materials, replacing caulk can be a manageable maintenance project. The most important parts are preparation, material compatibility, and allowing the joint to dry.
Remove the old material carefully
Use a suitable caulk-removal tool and follow the surface manufacturer’s guidance. Avoid damaging acrylic tubs, fiberglass shower bases, waterproofing components, or delicate tile finishes.
Do not force a sharp blade into an unfamiliar joint. Some shower assemblies rely on specific seams, drainage paths, or manufacturer-approved sealing details.
Clean and dry the exposed joint
Remove remaining sealant residue and clean the adjoining surfaces. If mold is present, address the contamination and its moisture source before proceeding.
Allow the joint to become thoroughly dry. A surface that feels dry to the touch may still conceal moisture behind an open seam. Persistent dampness, softened backing materials, or visible water damage warrants further investigation.
Choose a compatible bathroom sealant
A sealant labeled for the particular bathroom application is preferable to general-purpose material chosen solely because it is inexpensive or already available.
Many frequently wetted shower joints use a compatible sanitary silicone sealant, but the correct choice depends on the tub or shower material, surrounding finishes, movement requirements, and manufacturer instructions.
Some assemblies require particular sealants or prohibit caulking certain openings. Verify the installation requirements before sealing an unfamiliar joint.
Apply and cure according to instructions
Follow the sealant manufacturer’s directions for joint preparation, application, tooling, and cure time. Avoid leaving excessive ridges that collect water and cleaning residue.
Do not use the shower until the product has reached its specified water-exposure or curing condition. Cure requirements vary by formulation, temperature, and humidity.
If the area cannot dry, or the seal repeatedly fails because the adjoining surfaces move or leak, professional repair may be more appropriate than another application of caulk.
Why Does New Shower Caulk Sometimes Turn Black Again?
New caulk can discolor if the underlying conditions remain unchanged. Even a neatly applied, appropriate sealant cannot compensate for a constantly damp bathroom or water getting into a joint from another source.
The shower stays wet for too long
In a frequently used bathroom, one shower may finish shortly before another begins. Tile and sealant can remain damp throughout much of the day.
A household with several consecutive morning showers may need more attention to ventilation and surface drying than a rarely used guest bathroom.
The exhaust fan is not removing moisture effectively
An exhaust fan can be running without adequately clearing humid air. A clogged grille, inadequate airflow, poor duct installation, or a fan that does not vent outdoors can reduce its effectiveness.
If condensation remains unusually persistent, consider having ventilation performance evaluated rather than assuming the fan is doing its job.
Water is reaching the joint from an unexpected direction
A leak near a shower valve, plumbing connection, enclosure edge, or adjacent wall may keep materials damp even when the shower is not being used.
Repeated caulk replacement will not resolve water entering from behind the surrounding assembly.
The joint is moving more than the sealant can tolerate
A bathtub, shower base, or adjacent surface may move slightly under normal use. If that movement exceeds what the joint design and selected sealant can accommodate, the bead may separate repeatedly.
Frequent splitting in the same location is a reason to assess the joint and installation rather than applying thicker layers of sealant indefinitely.
How to Keep Bathroom Caulk From Turning Black
Consistent moisture management is generally more useful than increasingly aggressive cleaning. A few practical habits can reduce the conditions that encourage recurring growth.
Simple prevention habits
- Run the bathroom exhaust fan during showers and afterward. Continue ventilating until excess humidity and condensation have cleared.
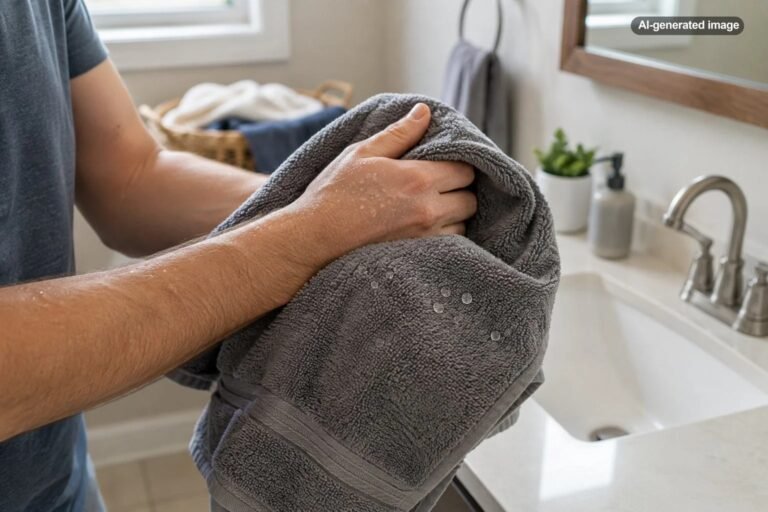
- Remove standing water. A squeegee or soft towel can help dry shower walls, ledges, and exposed joints.
- Keep shower curtains and doors positioned for drying. Avoid leaving wet fabric or overlapping surfaces bunched against the caulk.
- Clean soap residue regularly. Use surface-compatible products rather than allowing heavy buildup around the joint.
- Inspect the caulk periodically. Small gaps and lifting edges are easier to address before significant water intrusion develops.
- Investigate recurring condensation. Persistent dampness may point to insufficient ventilation or a broader humidity problem.
In humid climates, including many coastal areas, opening a window may not always provide useful drying. Outdoor air can sometimes introduce additional moisture. Effective exhaust ventilation and appropriate humidity control may be more reliable.
It is also worth distinguishing normal temporary shower moisture from ongoing dampness. A bathroom does not need to remain perfectly dry every minute, but joints should have opportunities to dry between uses.
When Black Caulk May Signal a Bigger Bathroom Problem
Most isolated black marks along bathroom caulk are maintenance concerns rather than emergencies. The situation changes when discoloration accompanies evidence that water is entering building materials.
Likewise, widespread suspected mold, hidden contamination, or moisture damage inside a wall should not be treated as an ordinary cosmetic caulking project. The source of the moisture and the condition of the affected materials need to be evaluated.
If you rent, report a repeatedly failing shower seal or suspected water intrusion to the property manager rather than undertaking unauthorized alterations. In a condominium, coordinate repairs that may involve shared plumbing or building components according to the applicable maintenance responsibilities.
Frequently Asked Questions
Is black bathroom caulk always mold?
No. Black discoloration can result from mold, accumulated dirt, staining, or residue trapped at the joint. Appearance alone cannot establish exactly what is present. Investigate persistent moisture and deterioration regardless of the stain’s identity.
Can mold grow underneath silicone caulk?
Yes. Although properly applied silicone forms a water-resistant seal, moisture can get behind a bead that has separated or was applied over a damp or contaminated surface. Mold may develop on suitable material behind the seal rather than within the silicone itself.
Why does black staining remain after cleaning?
The discoloration may be embedded in the material, located beneath the bead, or left behind as a permanent stain. Cleaning can remove surface contamination without restoring the original appearance. Replacement may be reasonable when staining persists or the caulk is deteriorated.
Will mold-resistant caulk prevent black spots permanently?
No. Mold-resistant sealants can help discourage growth under appropriate conditions, but they are not a substitute for sound installation, ventilation, regular cleaning, and moisture control.
Should I recaulk if the black spots keep coming back?
First determine whether the caulk is intact and whether the marks are removable surface contamination. Replace material that has lost adhesion, cracked, or developed persistent embedded staining. If properly installed new caulk quickly develops the same problem, investigate moisture and ventilation instead of repeatedly resealing.
The Bottom Line
Bathroom caulk keeps turning black most often because the joint remains damp long enough for mold or residue-related discoloration to develop. Sometimes the problem is limited to the surface; other times, aging caulk and water trapped beneath the bead make ordinary cleaning ineffective.
Start by checking whether the seal is intact. Clean sound caulk gently, replace failed or persistently stained material when appropriate, and address the moisture conditions that encouraged the discoloration. If water damage or hidden dampness is suspected, investigate that issue before making another cosmetic repair.
The most reliable long-term improvement is not the strongest cleaner or the thickest new caulk bead. It is a properly functioning seal in a bathroom that has a practical way to dry.
Sources & Further Reading
- U.S. Environmental Protection Agency: A Brief Guide to Mold, Moisture and Your Home – Bathroom mold prevention, cleanup considerations, and moisture control.
- U.S. Environmental Protection Agency: What Are the Basic Mold Cleanup Steps? – Cleaning surfaces, repairing leaks, and avoiding caulking over mold.
- U.S. Environmental Protection Agency: Should I Use Bleach to Clean Up Mold? – Guidance on routine bleach use and chemical safety.
- U.S. Environmental Protection Agency: The Key to Mold Control Is Moisture Control – Ventilation, drying, and controlling the conditions that support mold growth.