
How Often Should Shower Caulk Be Replaced?
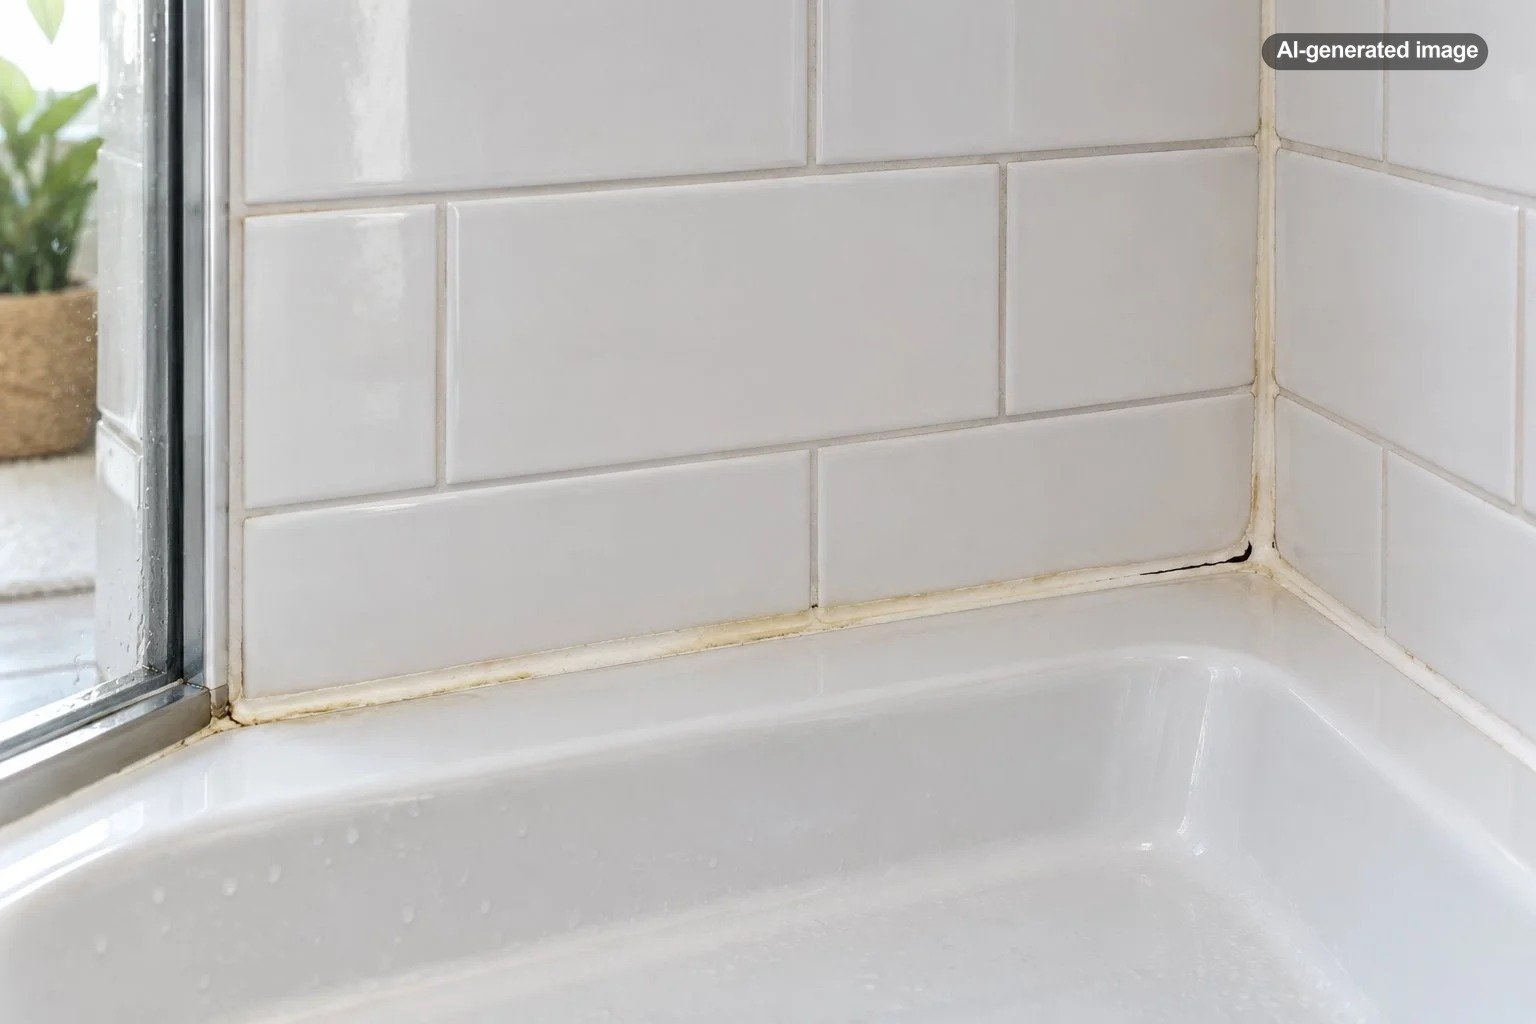
Shower caulk does not need to be replaced on a fixed schedule. The best time to replace it is when it starts cracking, peeling, separating from the surrounding surfaces, or developing staining that cannot be cleaned away. Some shower seals remain effective for years, while others deteriorate much sooner because of moisture, movement, cleaning products, or improper installation. The condition of the seal matters more than its age.
A simple inspection every few months can help you catch problems before water reaches places it should not. Pay particular attention to the joints where the shower walls meet the floor or tub, the inside corners, and the areas around fixtures and thresholds.
How Long Does Shower Caulk Normally Last?
There is no reliable universal lifespan for shower caulk. Its service life depends on the particular sealant, the surfaces it bonds to, the amount of joint movement, installation quality, and the bathroom environment.
A properly applied bathroom-grade silicone sealant can remain functional for years. However, that does not mean every silicone joint will last the same amount of time. An excellent product applied over soap residue or damp surfaces may fail sooner than a less expensive product installed correctly on a suitable, thoroughly prepared joint.
Bathrooms also experience different levels of wear. A guest shower used occasionally and dried between uses may put less stress on its seals than a primary shower used several times daily.
Rather than treating a particular number of years as an expiration date, make visual inspection part of regular bathroom maintenance. If you do not know when the caulk was installed, its current condition is still the most useful starting point.
Signs Your Shower Caulk Needs to Be Replaced
Visible deterioration usually offers better guidance than the installation date. Examine the seal in good light after the shower has dried.
Cracks or splits in the caulk
Small cracks can develop as sealant ages, shrinks, or struggles to accommodate movement between surfaces. A crack running through the bead may provide a path for water to enter the joint.
Look closely at corners and transitions between different materials. Even a narrow opening deserves attention if it extends through the sealing surface.
Peeling or separation from the wall or tub
Caulk should remain firmly attached along its edges. If a section curls upward, pulls away from tile, or separates from the bathtub, the seal has lost adhesion.
Do not assume that pressing a loose section back into place will restore its original performance. Damaged material generally needs to be removed, the joint cleaned and dried, and a suitable new seal applied.
Persistent dark staining
Dark spots on caulk are often associated with mildew or mold growth in persistently damp areas, although appearance alone cannot identify the cause. Some surface discoloration responds to appropriate cleaning. Staining embedded in deteriorated caulk may remain even after the surface is cleaned.
If the material is otherwise sound, clean it using a method compatible with the sealant and surrounding surfaces, then reassess. If the staining persists, returns rapidly, or accompanies loose or damaged caulk, replacement and further moisture investigation may be appropriate.
Hardening, brittleness, or deterioration
Different sealants age differently. A bead that has become brittle, fragmented, or visibly deteriorated may no longer accommodate the small movements that occur between bathroom surfaces.
Do not confuse normal firmness with failure. Some cured sealants are naturally firmer than others. Look for actual cracking, loss of adhesion, or material breakdown rather than relying on touch alone.
Water appearing outside the expected shower area
Water collecting near the base of a shower, damp trim, or unexplained moisture on the opposite side of a bathroom wall warrants attention. Failed caulk may be one possible contributor, but plumbing leaks, shower-door seals, tile assemblies, and waterproofing problems can produce similar symptoms.
Applying fresh caulk without finding the water source can conceal a developing problem rather than solve it.
Why Some Shower Caulk Fails Earlier Than Expected
Understanding the cause of early failure can help prevent the same problem after replacement.
Constant moisture and poor ventilation
Shower joints are repeatedly exposed to water and humid air. A bathroom that remains damp for long periods creates favorable conditions for microbial growth on surfaces and residue.
Running an effective exhaust fan, removing standing water, and allowing the shower to dry between uses can help control moisture. Ventilation does not repair damaged caulk, but it addresses one of the conditions that can make bathroom maintenance more difficult.
Soap residue and cleaning chemicals
Soap film and body-care products can accumulate along joints. That buildup can interfere with new sealant adhesion if it is not removed before installation.
Repeated exposure to cleaning products that are incompatible with the sealant or surrounding finishes may also contribute to deterioration. Follow the cleaner and sealant manufacturers’ instructions, and avoid aggressive scraping or abrasive cleaning that damages the joint.
Movement between bathroom surfaces
A shower wall, tub, and floor do not always move together. Temperature changes, normal use, and slight structural movement can place stress on joints.
Flexible sealants are designed to accommodate appropriate joint movement, but they still have limits. An incorrectly sized bead, unsuitable material, or unstable substrate may cause repeated cracking.
Incomplete removal of old caulk
New caulk often performs poorly when applied over old, loose, contaminated, or incompatible material. Even when the fresh bead looks smooth, the underlying bond may be unreliable.
Proper surface preparation matters at least as much as achieving a neat finished line.
Can You Clean Shower Caulk Instead of Replacing It?
Yes, when the seal is still intact and the problem is limited to removable surface buildup. Not every discolored bead needs to be discarded.
| What you notice | Best next step |
|---|---|
| Soap film on firmly attached caulk | Clean with a compatible nonabrasive product. |
| Light surface staining without damage | Clean, dry, and inspect again. |
| Persistent staining embedded in the material | Consider replacement and check for excess moisture. |
| Cracks, gaps, or peeling edges | Remove the failed sealant and recaulk appropriately. |
| Repeated leaks or deteriorating surrounding materials | Investigate the underlying problem before resealing. |
A useful distinction is whether the material has merely become dirty or has actually stopped functioning as a seal. Cleaning addresses surface contamination. Recaulking addresses a failed joint. Neither approach repairs defective waterproofing behind the shower.
How to Inspect Shower Caulk Without Damaging It
A careful inspection takes only a few minutes and does not require pulling at healthy sealant.
What to do
- Let the shower dry. Inspect after the water has drained and the surfaces are no longer visibly wet.
- Start at the lowest joints. Check where shower walls meet the tub, shower base, or floor.
- Examine the corners. Look for vertical splits, missing sections, or edges separating from adjacent surfaces.
- Check around fixtures and enclosures. Inspect applicable sealed connections near trim, thresholds, and shower-door frames without disturbing drainage openings.
- Look beyond the caulk. Notice loose tiles, damaged grout, discoloration, or moisture outside the shower.
- Record questionable areas. A photograph can help you determine whether a minor-looking defect is changing over time.
Use your eyes rather than a sharp tool to test adhesion. Digging into a sound bead can create the very opening you were trying to prevent.
If you find an obvious gap in a water-exposed joint, plan a proper repair instead of continuing to use the shower while monitoring it.
Should You Replace All the Shower Caulk at Once?
Not necessarily. The correct scope depends on which joints have failed and whether the surrounding material remains sound.
If one isolated section has deteriorated and the manufacturer permits an appropriate repair method, a limited replacement may be reasonable. However, a fresh patch must bond to suitable clean surfaces, and it can be difficult to create a reliable transition between old and new sealant.
When a continuous run has multiple cracks, widespread staining, or repeated separation, removing and replacing the entire affected run is usually the more sensible approach. This avoids leaving several questionable seams within one water-exposed joint.
Also remember that not every bathroom joint should automatically be sealed. Some shower-door assemblies, tracks, and other systems have intentional drainage openings. Follow the fixture and enclosure manufacturers’ instructions rather than applying caulk wherever water is visible.
How to Replace Shower Caulk Properly
Recaulking is a manageable maintenance project in many bathrooms, provided the joint is accessible, the surrounding surfaces are sound, and there is no evidence of hidden water damage.
Remove the old sealant
Use a suitable caulk-removal tool or manufacturer-approved remover to loosen the existing material. Work carefully around acrylic tubs, fiberglass shower bases, delicate finishes, and waterproofing components.
Remove loose material and remaining residue without gouging the surrounding surfaces. Sharp blades can damage finishes and should be handled with particular care.
Clean and thoroughly dry the joint
Remove soap film, dirt, and contamination with products compatible with the surfaces. If mold is present, address the moisture source and clean the affected area appropriately before resealing.
Do not apply caulk over visibly moldy or wet material. A clean, dry, sound substrate is essential for good adhesion.
Choose a sealant approved for the application
Look for a product specifically labeled for showers or continuously damp bathroom environments, and verify compatibility with the tub, tile, grout, stone, or enclosure material.
Bathroom-grade 100% silicone is a common choice for water-exposed joints because it offers flexibility and water resistance. Some other bath-rated sealants are suitable for particular applications, but ordinary interior trim caulk is not automatically appropriate for a shower.
Silicone is typically not paintable, which makes color selection important. For natural stone, specialty finishes, or unusual substrates, check manufacturer guidance before choosing a sealant or cleaning solvent.
Apply an appropriately sized bead
Follow the sealant manufacturer’s instructions for joint preparation, permissible width and depth, backing materials, application temperature, and tooling.
Apply a continuous bead that contacts the intended bonding surfaces and smooth it within the product’s stated working time. More caulk is not necessarily better. Oversized or poorly shaped joints can be more prone to problems, and deeper gaps may require an appropriate backing material rather than being filled entirely with sealant.
Allow the required curing and water-exposure time
Do not assume that a bead is ready for shower use as soon as its surface feels dry. Skin formation, permitted water exposure, and full curing are different milestones.
Some bath sealants permit water exposure relatively soon after application, while others require a substantially longer waiting period. Follow the exact product label and technical instructions. Temperature, humidity, and bead dimensions can affect curing.
How to Make Shower Caulk Last Longer
Good maintenance focuses on reducing avoidable moisture exposure and preserving adhesion, not repeatedly treating the bead with harsh chemicals.
- Ventilate after showers. Run the bathroom exhaust fan and keep the room ventilated long enough to remove excess moisture.
- Remove standing water. A squeegee or soft cloth can help dry areas where water habitually collects.
- Clean regularly. Prevent thick soap buildup along corners and lower joints using suitable cleaning products.
- Avoid aggressive scrubbing. Abrasive pads and sharp tools can damage sealant edges and adjacent finishes.
- Watch recurring problem spots. Corners, thresholds, and tub-to-wall joints deserve additional attention because they often experience movement or repeated wetting.
- Repair plumbing and drainage issues promptly. Persistent moisture can undermine even a carefully installed seal.
- Inspect after renovations or movement. Changes to fixtures, enclosures, or surrounding surfaces may affect the integrity of existing joints.
A household with several daily shower users may benefit from more frequent checks than one with an infrequently used guest bathroom. The objective is to spot damage early, not to replace sound caulk unnecessarily.
When Should You Call a Professional?
Simple caulk replacement is not always the right repair. Professional evaluation is particularly useful when water appears to be traveling behind the enclosure, flooring feels soft, tiles are loose, or the same joint keeps failing despite careful replacement.
Recurring mold growth, substantial dampness, damaged wallboard, or unexplained moisture outside the shower also deserves investigation. A qualified plumber, tile professional, waterproofing specialist, or restoration contractor may be appropriate depending on the suspected cause.
For renters, document the condition and notify the property manager before undertaking repairs that could affect the shower enclosure or waterproofing. Condo owners should also consider whether the problem involves shared building components or requires coordination with building management.
Frequently Asked Questions
Should I replace shower caulk every year?
No. Annual replacement is unnecessary when the caulk remains intact, firmly attached, and suitable for its purpose. Regular inspection is more useful than automatic replacement on an arbitrary schedule.
Can I put new silicone caulk over old silicone?
It is generally better to remove the old sealant and prepare the joint properly. New silicone may not adhere reliably to aged, contaminated, or incompatible material. Follow the sealant manufacturer’s instructions for any approved repair method.
Does black staining always mean the shower caulk has failed?
No. Dark staining may be surface contamination that can be cleaned without replacing an otherwise sound seal. Persistent discoloration, recurring growth, or staining combined with cracking or separation is a stronger reason to investigate and possibly replace the caulk.
How long should I wait before using the shower after recaulking?
Wait for the specific water-exposure period stated by the sealant manufacturer. Products differ, and full cure time may be longer than the minimum time before water contact. Do not substitute a universal waiting period for the product instructions.
Is shower caulk the same as grout?
No. Grout fills many of the joints between tiles, while flexible sealant is commonly used at appropriate changes of plane and transitions between different materials. These components serve different purposes, and neither replaces the waterproofing system behind a properly constructed shower.
The Bottom Line
Shower caulk should be replaced when its condition shows that it can no longer provide the intended seal. Cracks, peeling edges, gaps, persistent embedded staining, and repeated moisture problems matter far more than the number of years since installation.
Inspect the joints regularly, keep the bathroom ventilated, and choose a compatible shower-rated sealant when replacement becomes necessary. If you find evidence of water damage beyond the joint, investigate the underlying problem first. A neat caulk line is useful, but a dry and properly functioning shower assembly is the real goal.
Sources & Further Reading
- DAP: How to Remove Old Caulk & Sealant – Manufacturer guidance on recognizing failed caulk and preparing joints for replacement.
- DAP: Caulks & Sealants – Guidance on sealant material differences, water exposure, and curing considerations.
- DAP: Frequently Asked Questions – Information about bathroom sealant selection, joint sizing, adhesion, and movement.
- U.S. Environmental Protection Agency: A Brief Guide to Mold, Moisture and Your Home – Guidance on moisture control, cleaning, and identifying situations that require additional attention.
- U.S. Environmental Protection Agency: Remodeling Your Home and Indoor Air Quality – Guidance on bathroom ventilation and moisture management.